Shooting inside an official LEGO set is probably one of the most difficult challenges for a LEGO photographer.
Thankfully, the design of the attic of the Medieval Blacksmith set is built like a modular, plus it has a removable roof that allows for a lot more camera angles than most other sets.
That made it easy for me to take just the floor I needed and open up one side.
In this post, I’ll show you how I shot this window-lit attic bedroom scene.
Lighting
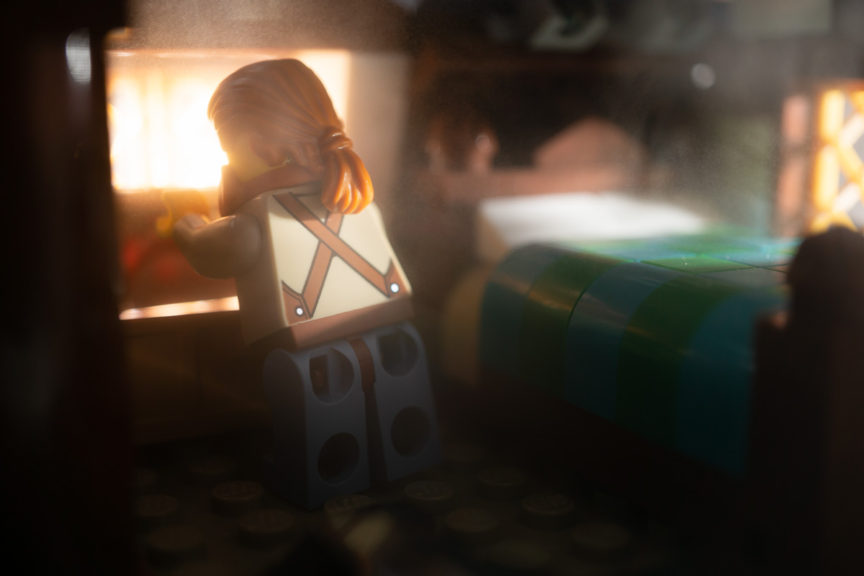
I like shadows and atmosphere in my LEGO photos, both of which appear with careful lighting.
For this shot, I first put a snoot on my flash, placed it behind the building, and aimed it into the window where the chest is placed. This light serves as the backlighting for the blacksmith who is looking through his chest.
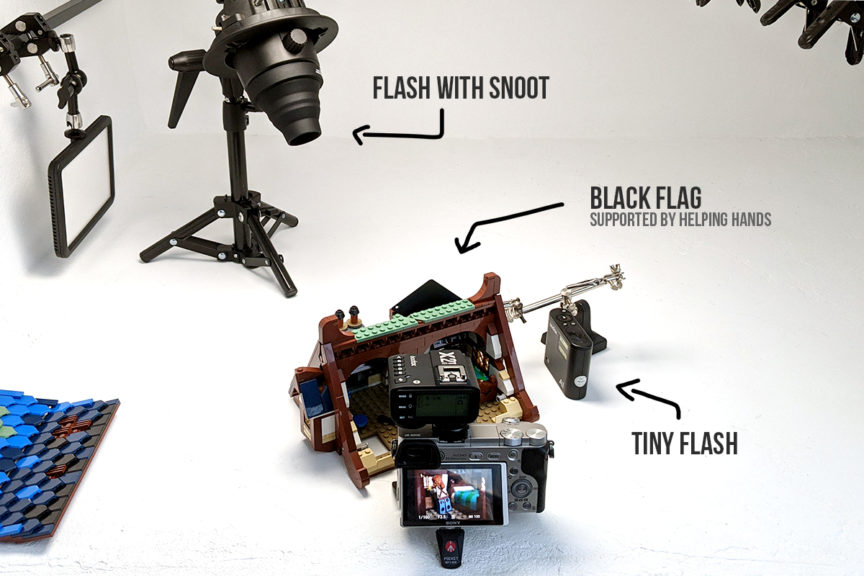
A snoot is a conical light modifier that restricts light so that it’s essentially a spotlight. I wanted to use a snoot so that light would mostly hit the window and not the rest of the building.
There are always gaps between bricks that can let light in strange places, so it’s a good idea to control most of that spill at the light source.

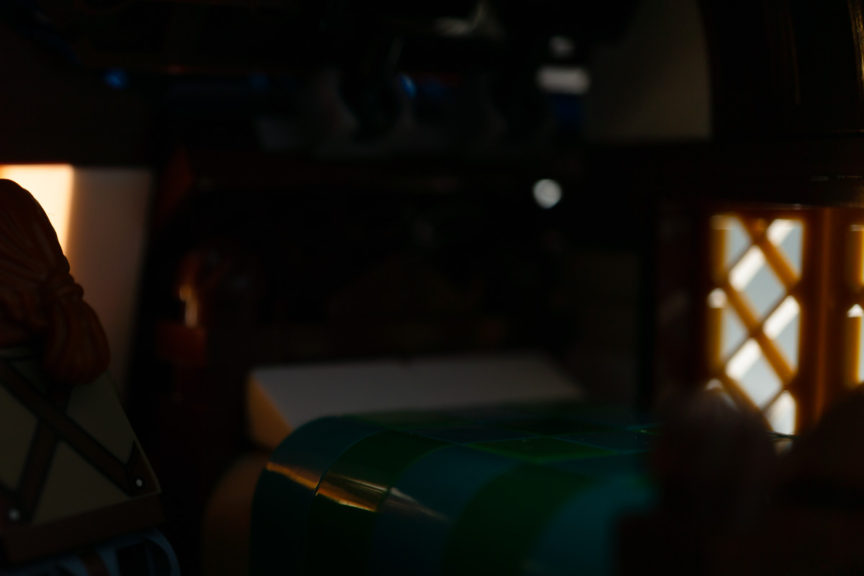
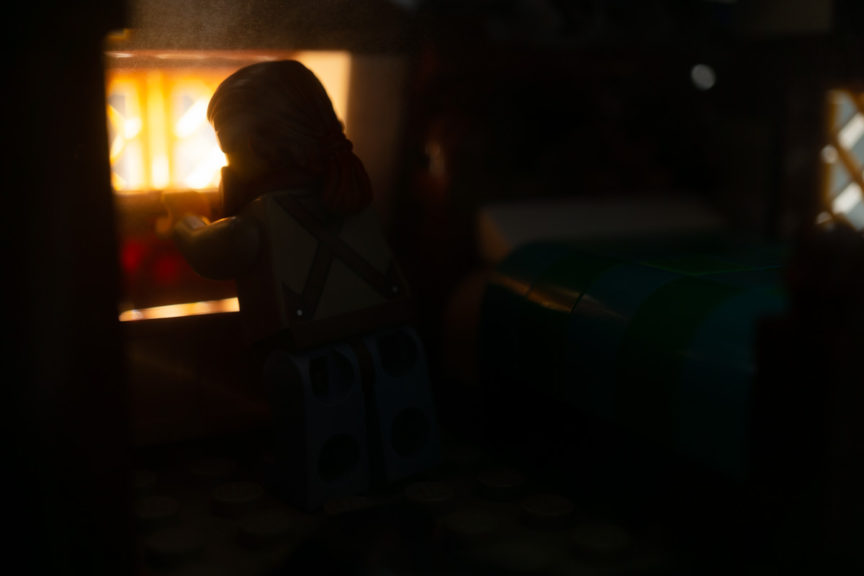
Even with the snoot, I still got stray light coming in. In the photo above, that bright area over the bed is a space where light is coming through and hitting the bed.
So to eliminate that, I first tried to flag the light with a black card held up by helping hands.
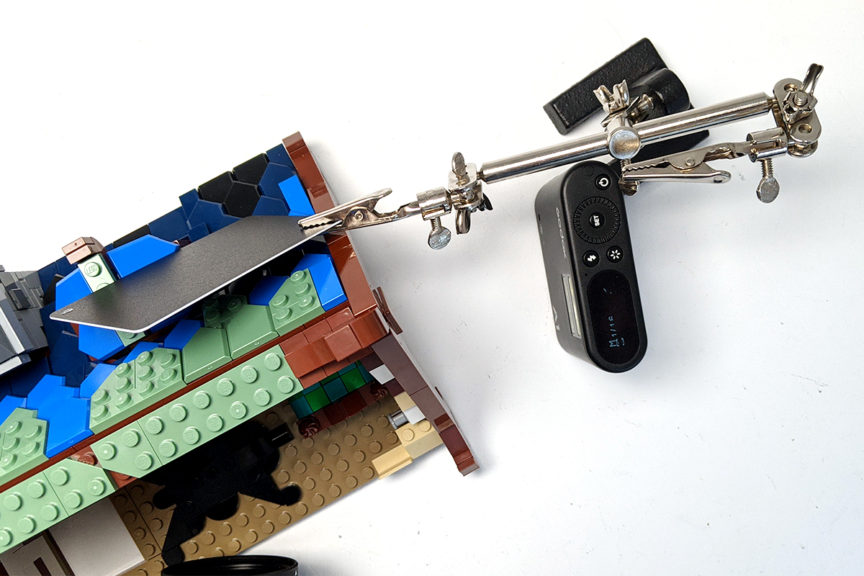
That cut out a lot of the light hitting the bed:
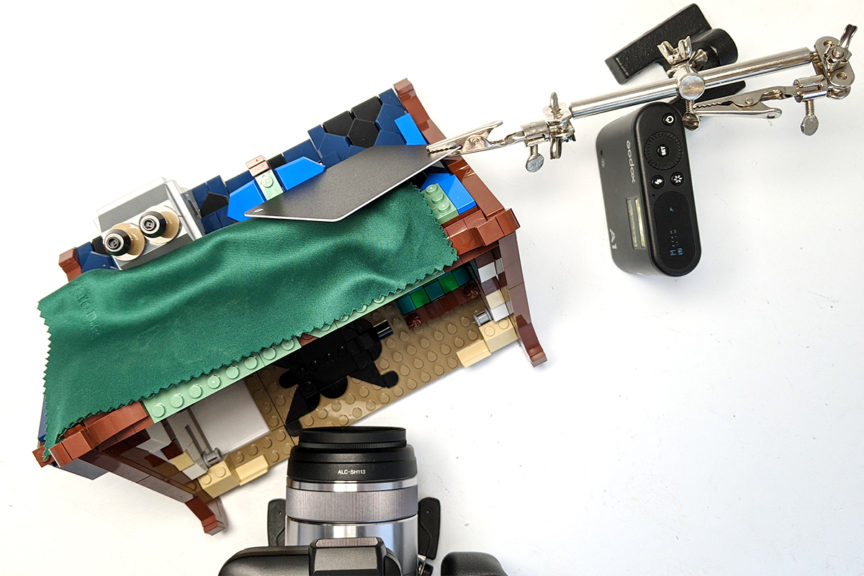
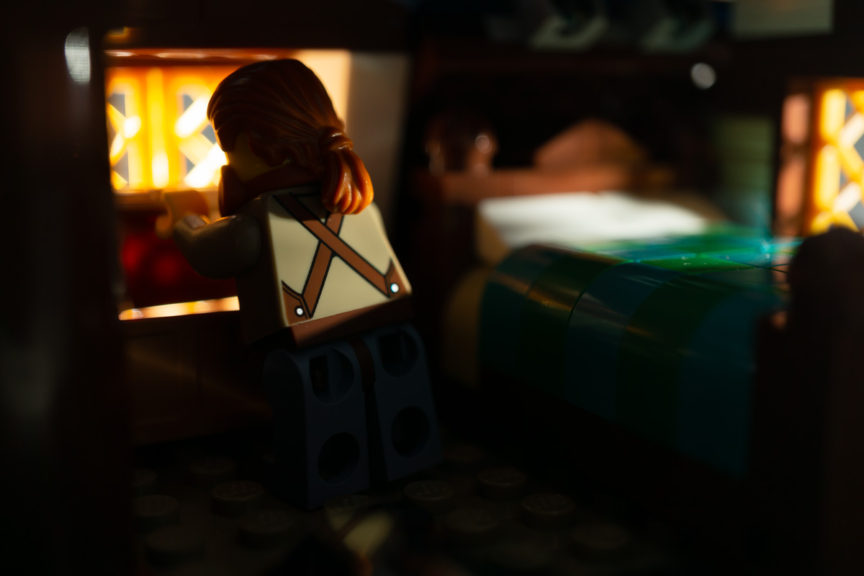
There was still a little crack of light to the left (unseen in the cropped images above) so I ended up just draping a microfiber cloth I had lying around to block the rest of the roof.
Here’s the photo with just the backlighting and flags:
There’s some mist in there too as I was testing the visibility of it against the back light.
Having the backlighting set up to how I liked it, I could move on to the main light, which I wanted to come in through the window to the right.
Why not just light from the big open side, you say? Well, I could but that’s no fun. I want shadows and drama!
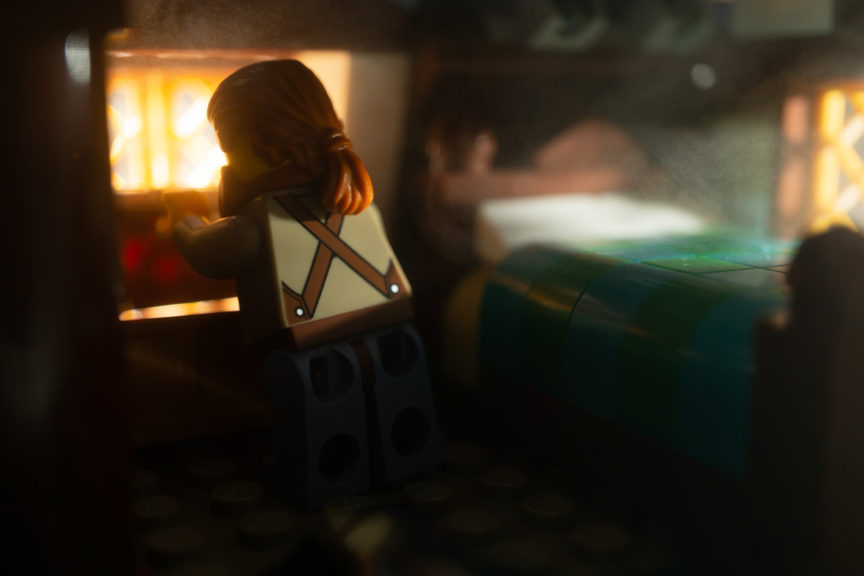
Here’s what the photo looks like with the tiny flash on at its lowest power setting:
If I were going for realism, I would position the tiny flash in the same direction as the flash with the snoot. But I approach lighting in a stylized way, and so I will depart from physics when it serves my story better to do that.
Here, it serves my story better to have the tiny flash facing the window directly so it can light my subject with dramatic lighting. That’s what I want more than the accurate direction of lighting on the bed..
I like how the form of the blacksmith is carved out by the backlight and how the light rakes across the bed and illuminates his back. It’s still a bit dark though so I turn to my favorite lighting tool: atmosphere.
I have a lot of atmosphere tools but my favorite is the nano facial mister. I spread the gospel of nano facial misters wherever I go! (Say no to Atmosphere Aerosol because it leaves an oily mess.)
I call atmosphere a “lighting tool” because it diffuses light. Ask any DJ. They use haze machines so their lighting effects show up.
The photo is already much brighter and it’s almost there.
Post-processing
I might have been better off slowing the shutter down a little bit to let in some ambient light to lift those shadows. But I didn’t and it’s too late baby, now it’s too late. Though we really did try to make it.
It’s all right because it’s a quick adjustment in Lightroom:
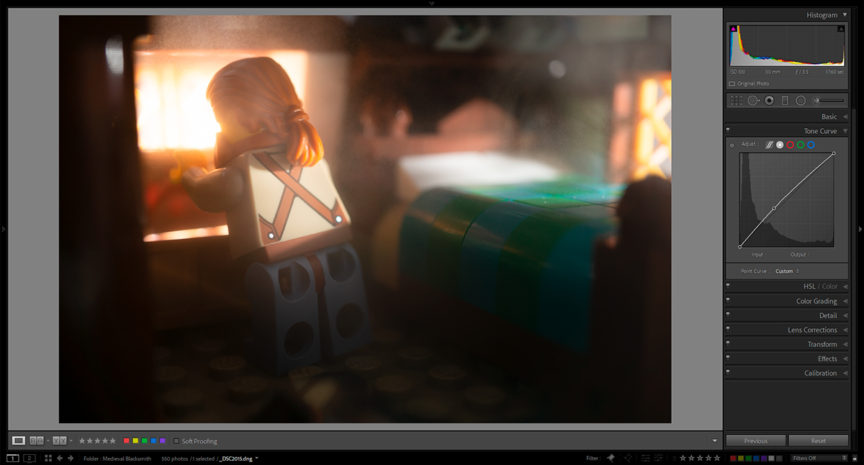
I pulled up the curve in the middle a little bit to brighten the photo overall. I also added a radial filter to increase exposure over the blacksmith.
If you’re wondering why I didn’t simply increase the flash power to make him brighter in-camera, that would have made the window and bed very bright. I’d much rather get that right and lift shadows instead.
Lastly, I adjusted the white balance to get rid of the greenish tint from the tiny flash.
And there you have it:
If you are interested in learning more about lighting, I have a playlist for you on YouTube that teaches you everything you need to know to get started:
If you want to know more about the set, check out The APhoL’s review of the Medieval Blacksmith.